
Now that the system layout has been designed, the equipment procured, and the lagoons and site are prepared, it’s time to deliver the equipment and install the aeration system.
Delivery
If we are assisting you in the installation of your system, we will deliver the equipment ourselves. If you need a boat, we can supply that as well. We will also bring the alignment stakes and required tools. If there is anything specific we need from you, we will arrange that before we come out.
Off-Loading & Set Up
The aeration compressors and other equipment is unloaded at the location of the pads that have been prepared where they will be installed. The aeration compressor cabinets are placed on the pads, attached to power and tested for correct function.
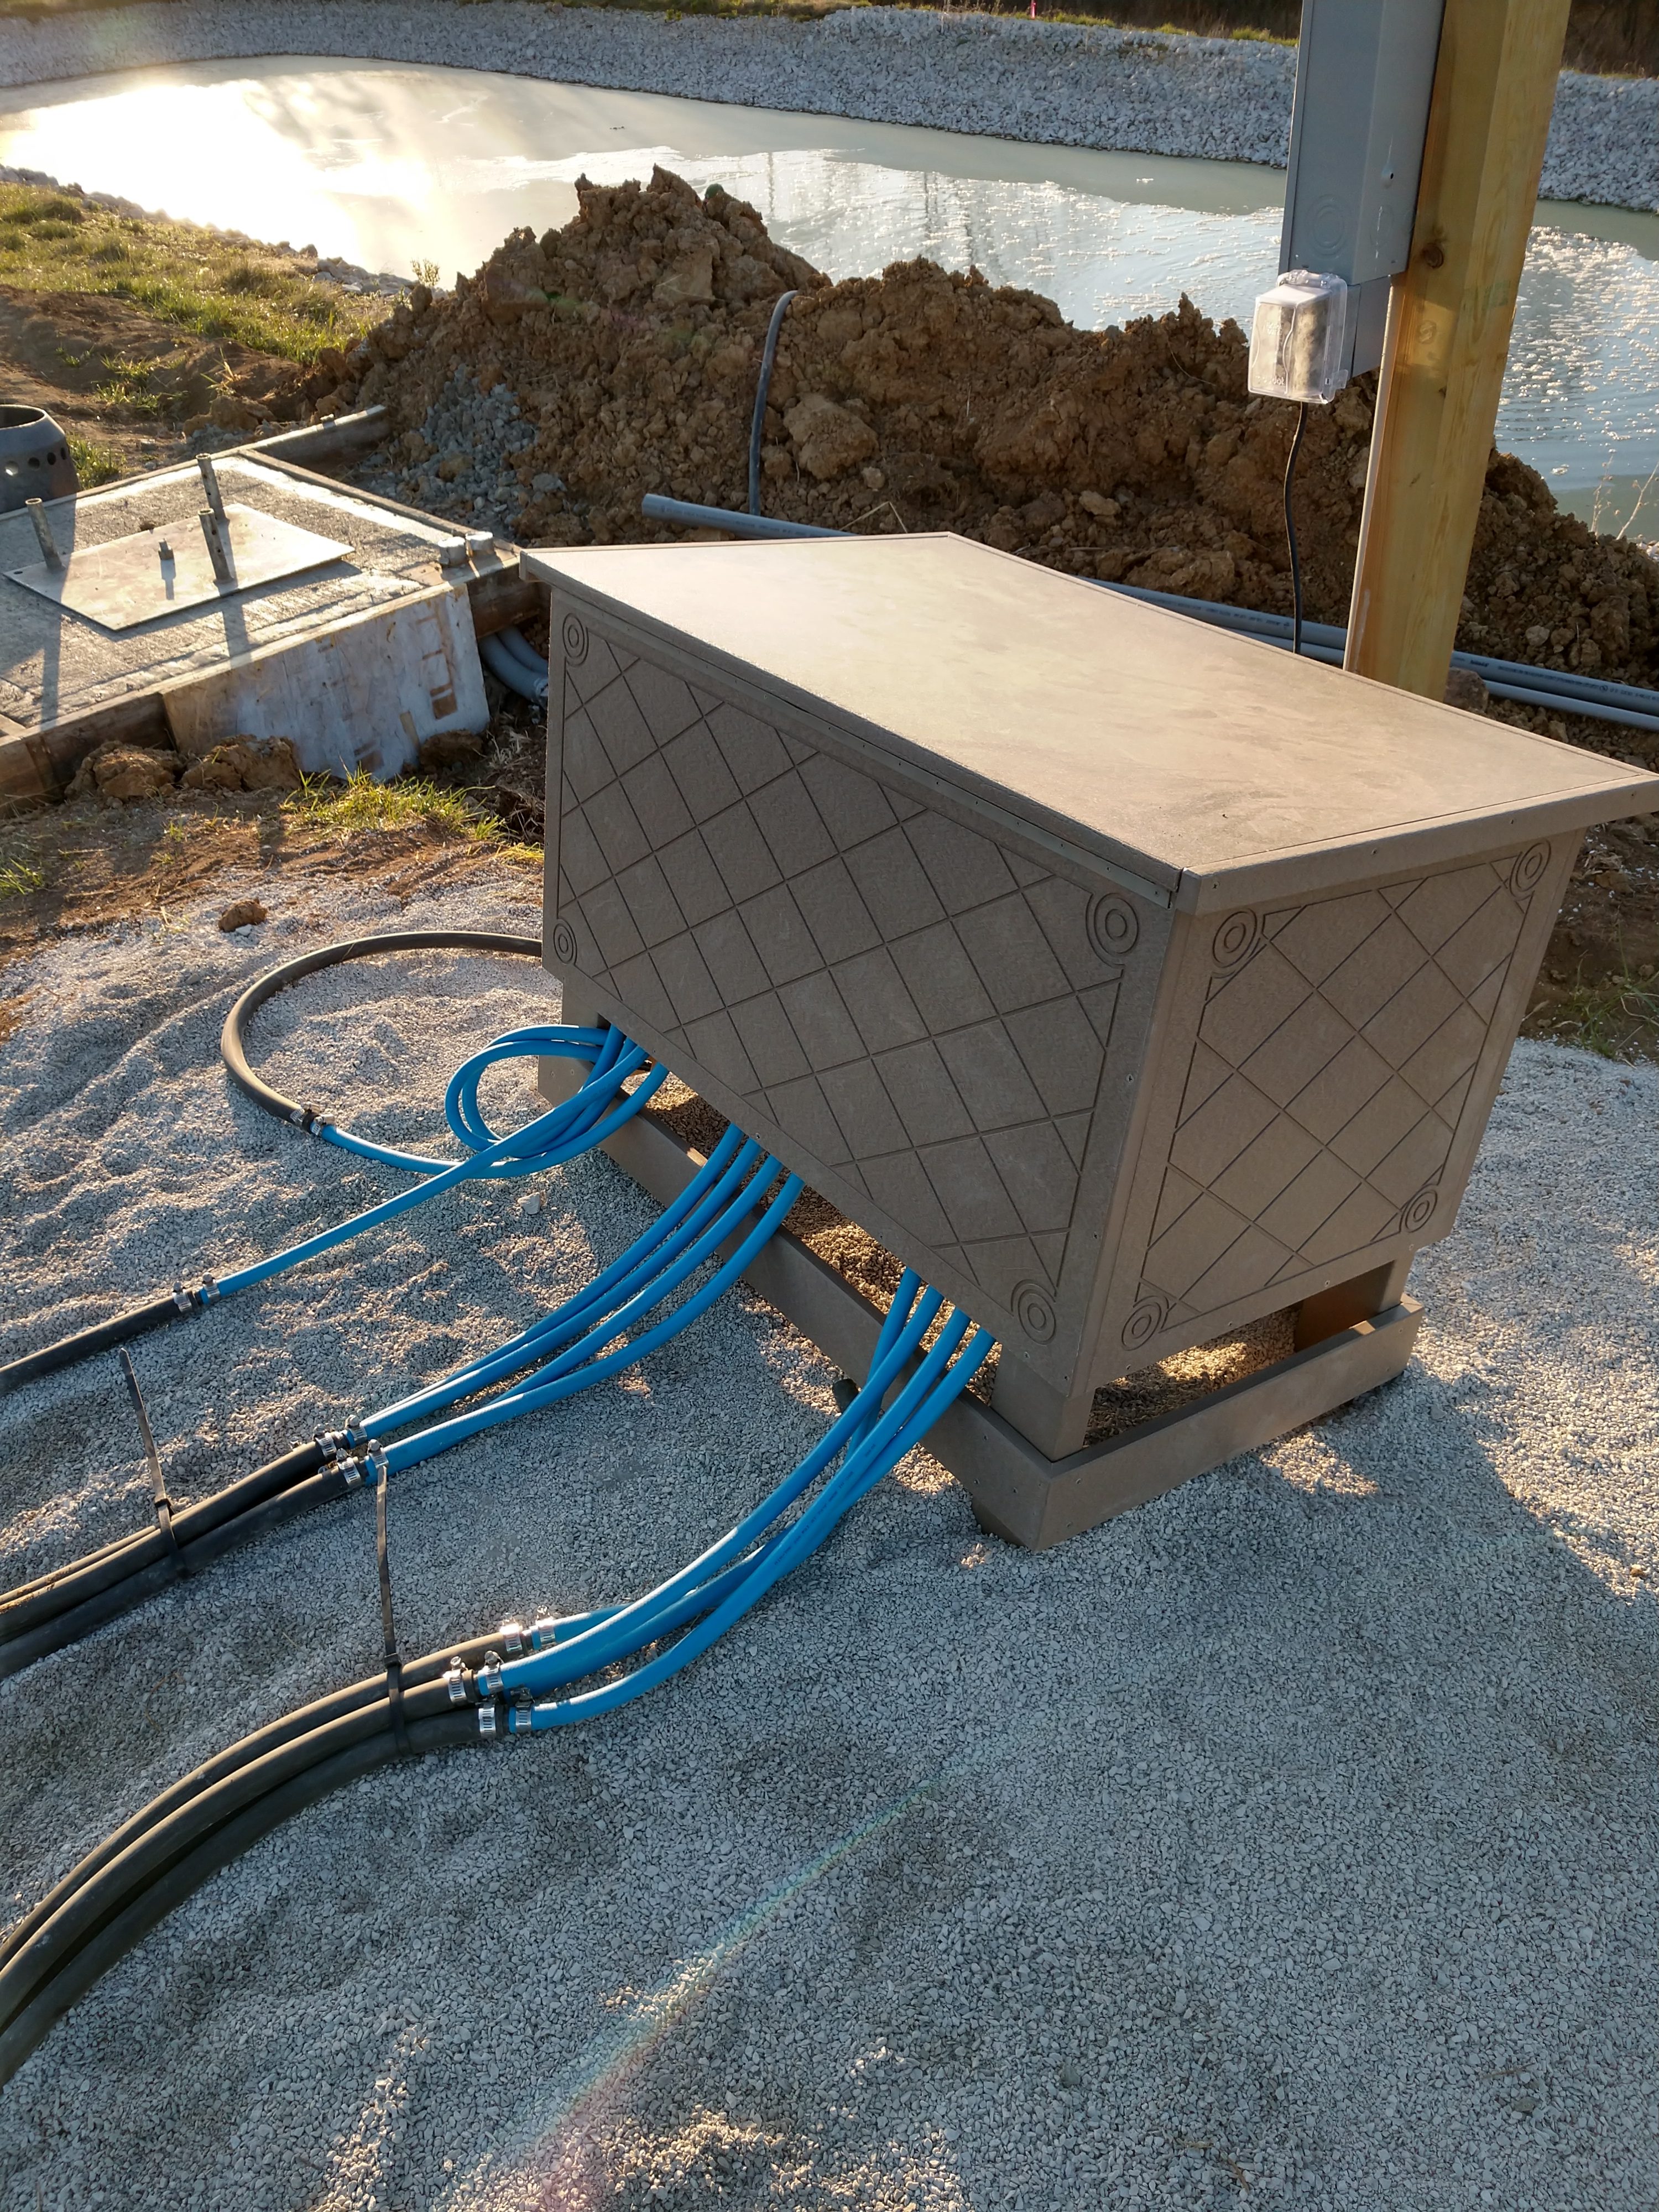
Here is a cabinet set into place with the air tubing installed.
Laying Out the Grid for The Diffusers
The diffusers are usually laid out in a grid. Prior to installing the first diffuser, drive stakes with marker tape into the ground around the lagoon to use as reference points to install the diffusers in the right place. Make sure the stakes are visible when you are on the water! Clear Water Supply will provide a layout drawing for your layout dimensions.
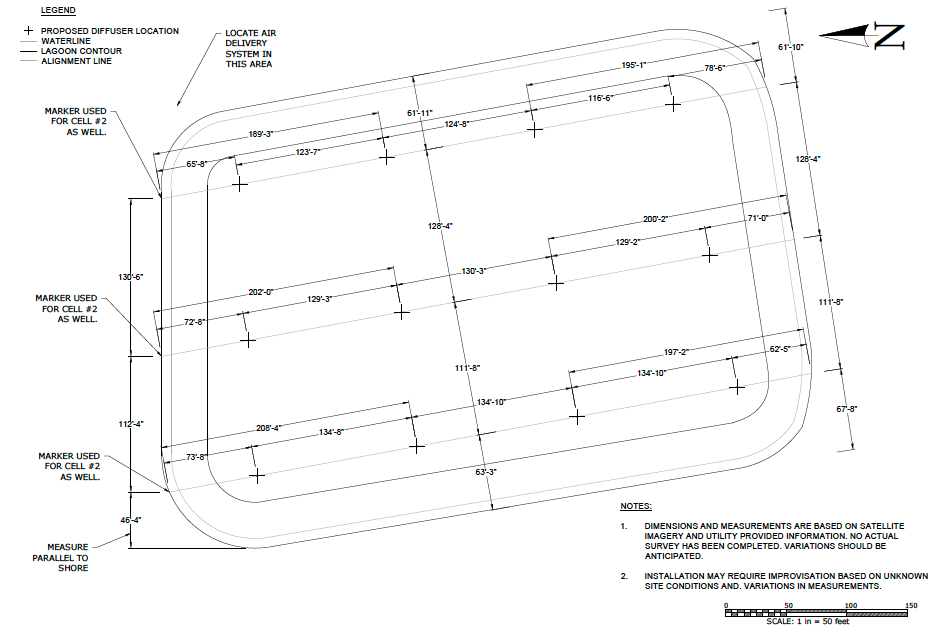
Typical layout of a wastewater lagoon for planning the placement of aerators or diffusers.
Start in one corner and work out from that point. Often times site conditions are different than anticipated so be prepared to make field improvisations as required. Either way, setting the stakes saves a lot of time when placing the diffusers and makes for a more accurate installation.
Diffuser Placement
If you are using your boat, it will have to be set up to hold the tubing spool and all the clamps needed along with diffusers (do not overload the boat). Two people on the boat is preferred; one to navigate to the drop spot and the other to feed the tubbing. The first diffusers to be installed are the ones that are furthest away from the aeration compressors. Starting at the location of the aeration compressors, Connect the tubing and navigate to the furthest drop spot using the alignment stakes as a reference. Once at the drop spot, cut the tubing and attach to the diffuser with a stainless clamp. A buoy is also attached to each diffuser with a cord so it can be easily retrieved after installation. At that point you’re ready to drop. The diffusers are weighted so they will settle of the bottom right-side-up.
Repeat this process until all diffusers are dropped.
Testing the Function of the Aeration System
After all diffusers are dropped at their zones, open the cabinet and adjust the valve to each diffuser to get an equal flow across the lagoon. If a diffuser is not bubbling, it may have been covered with sludge. Turn all valves to the closed position and then open the one that is not bubbling. This will force all of the air to one diffuser. The additional air should allow the diffuser to clear. After the function of the diffuser is restored, open the rest of the valves on that manifold and adjust valve position for equal flow again.
Here you can see the bubbles created by the diffusers. A properly adjusted system will have the same amount of bubbles coming from each diffuser.
At this point, your system is all set up!
The next installment is Part 4 which describes what you can do to get the most out of your new aeration system and complete your lagoon rehabilitation.